Pytorch Image Augmentation
- Introduction
- 데이터
- Augmentation Functions
- Normalization
- Random Horizontal Flip
- Random Vertical Flip
- Random Affine
- Random Crop
- Random Resized Crop
- Random Gray Scale
- Random Perspective
- Random Rotation
- Random Rotation (expand=True)
- Random Choice
- Color Jitter (brightness)
- Color Jitter (contrast)
- Color Jitter (saturation)
- Color Jitter (hue)
- Color Jitter (ALL)
- Resize
- Channel Transpose
- ToTensor
Introduction
Pytorch 기본 라이브러리에서 image augmentation툴을 제공합니다.
대충 결과를 알수는 있지만, 정확하게 어떻게 나온다는 것을 알기 위해서 정리해보았습니다.
데이터
데이터는 CIFAR10 데이터를 사용하였습니다.
import tempfile
from torchvision.datasets import CIFAR10

cifar10 = CIFAR10(tempfile.gettempdir(),
                  train=True,
                  download=True)
Augmentation Functions
Normalization
물론 normalization이 augmentation으로 보기에는 좀 부족해보이나..
Pytorch transforms을 사용하면서 많이 사용하는 함수라서 같이 넣었습니다.
코드상에서 중요 포인트는 ToTensor() 이후에 사용해야 합니다.
중요하게 볼 점이 또하나 있는데, channel의 위치가 변경되었습니다.
이는 ToTensor() 함수를 실행하면 channel의 위치가 바뀝니다.
Normalize 함수는 ToTensor 함수에 의해서 변경된 channel (c, h, w) 위치를 사용해서 normalization을 합니다.
만약 Normalize 함수에 (h, w, c) 형태로 image가 제공시 에러가 납니다.
따라서 Normalize 함수를 호출전 반드시 ToTensor 함수를 호출해야 합니다.
_mean = cifar10.data.mean(axis=(0, 1, 2)) / 255
_std = cifar10.data.std(axis=(0, 1, 2)) / 255

print('shape   :', cifar10.data[0].shape)
print('RGB mean:', _mean)
print('RGB std :', _std)

aug_f = transforms.Compose([transforms.ToTensor(),
                            transforms.Normalize(_mean, _std)])
img = aug_f(cifar10.data[0])

print('augmented img shape:', img.shape)
print('augmented img mean :', img.mean(axis=(1, 2)))
print('augmented img std  :', img.std(axis=(1, 2)))
shape : (32, 32, 3)
RGB mean: [0.49139968 0.48215841 0.44653091]
RGB std : [0.24703223 0.24348513 0.26158784]
augmented img shape: torch.Size([3, 32, 32])
augmented img mean : tensor([ 0.2524, -0.2875, -0.7470])
augmented img std : tensor([0.6458, 0.6837, 0.6127])Random Horizontal Flip
def display_augmented_images(aug_f):
    fig, subplots = plt.subplots(2, 5, figsize=(13, 6))
    for i in range(5):
        axi1 = subplots.flat[i]
        axi2 = subplots.flat[i+5]

        original_img = Image.fromarray(cifar10.data[i])
        augmented_img = aug_f(original_img)

        axi1.imshow(original_img)
        axi2.imshow(augmented_img)
        axi1.set_title('original_img')
        axi2.set_title('augmented_img')

flip = transforms.RandomHorizontalFlip(p=1)
display_augmented_images(flip)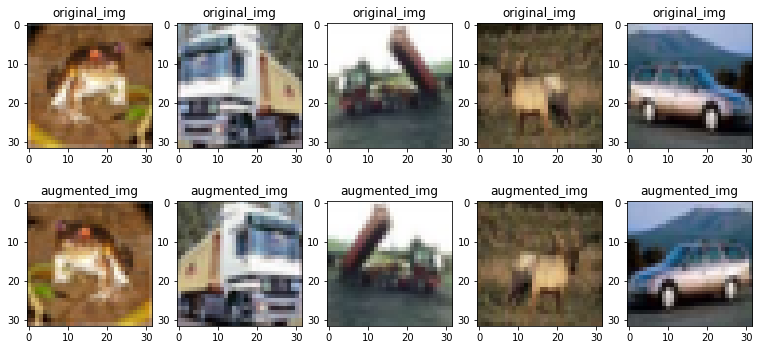
Random Vertical Flip
aug_f = transforms.RandomVerticalFlip(p=1)
display_augmented_images(aug_f)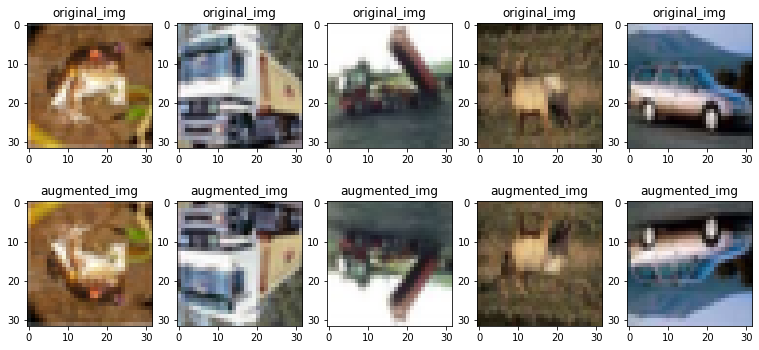
Random Affine
aug_f = transforms.RandomAffine(30)
display_augmented_images(aug_f)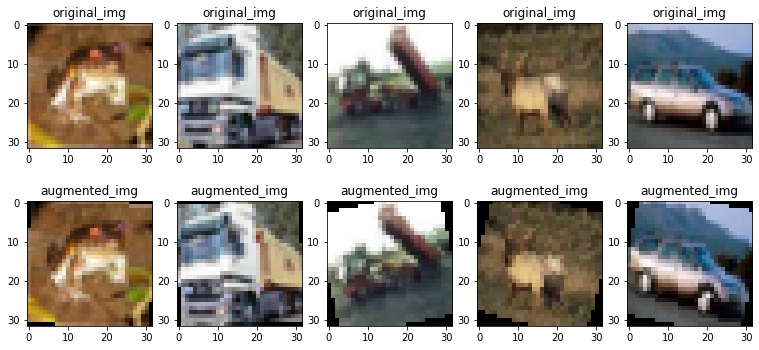
Random Crop
aug_f = transforms.RandomCrop((20, 20))
display_augmented_images(aug_f)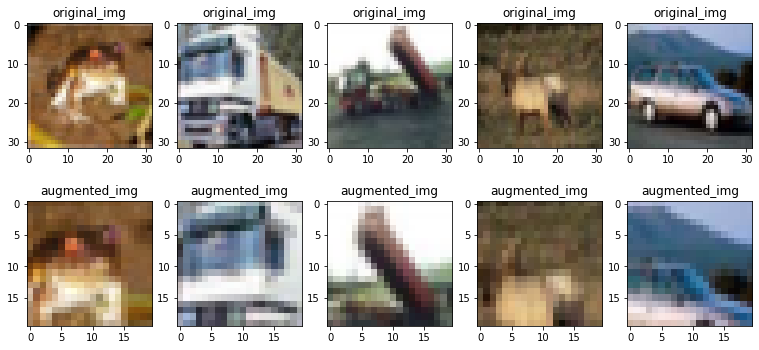
Random Resized Crop
aug_f = transforms.RandomResizedCrop((22, 22))
display_augmented_images(aug_f)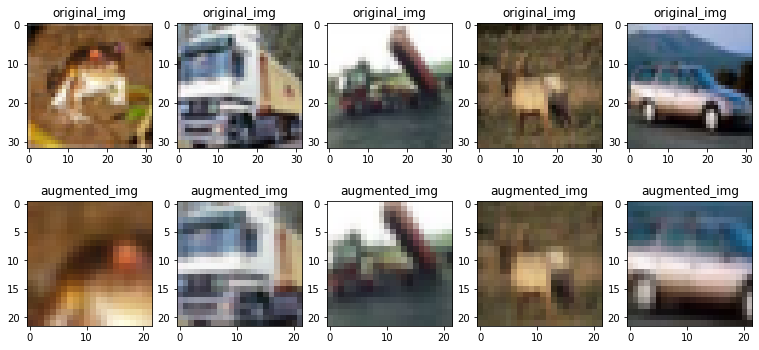
Random Gray Scale
약하게 gray scale 되거나 그런게 아니라.. color 또는 gray 둘로 나뉜다
aug_f = transforms.RandomGrayscale(p=1)
display_augmented_images(aug_f)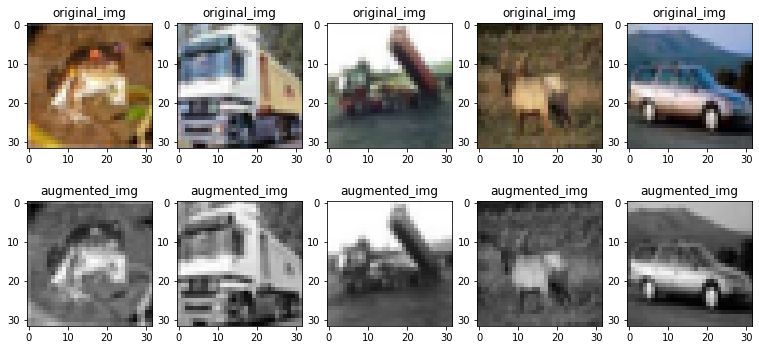
Random Perspective
약하게 gray scale 되거나 그런게 아니라.. color 또는 gray 둘로 나뉜다
aug_f = transforms.RandomPerspective()
display_augmented_images(aug_f)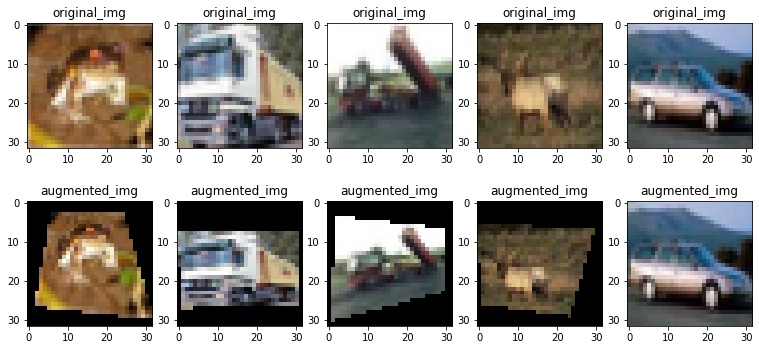
Random Rotation
약하게 gray scale 되거나 그런게 아니라.. color 또는 gray 둘로 나뉜다
aug_f = transforms.RandomRotation(90, expand=False)
display_augmented_images(aug_f)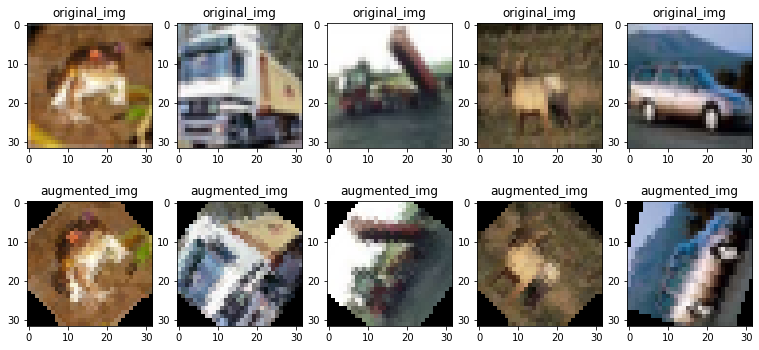
Random Rotation (expand=True)
aug_f = transforms.RandomRotation(90, expand=True)
display_augmented_images(aug_f)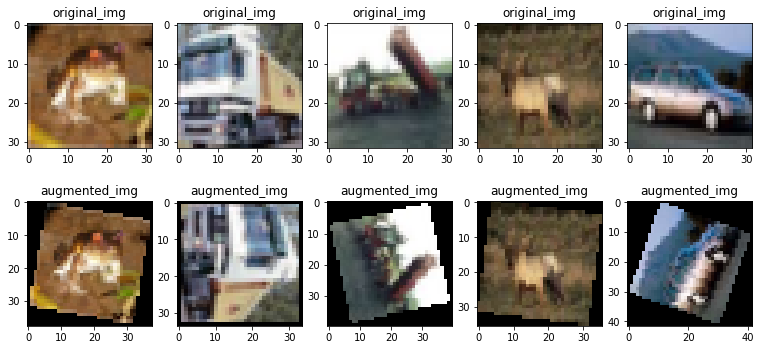
Random Choice
aug_f = transforms.RandomChoice([transforms.RandomGrayscale(p=1),
                                 transforms.RandomVerticalFlip(p=1)])
display_augmented_images(aug_f)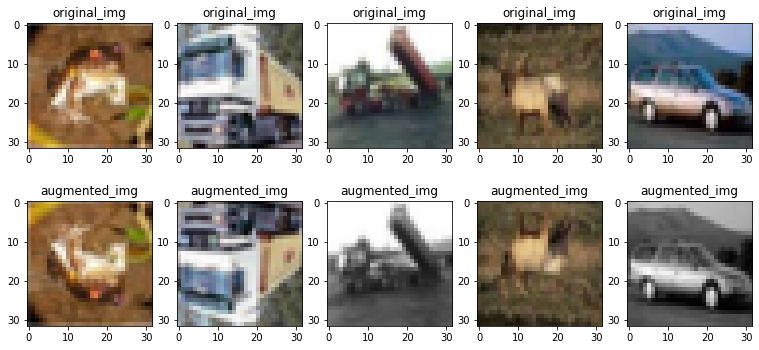
Color Jitter (brightness)
램덤하게 brightness를 설정한다
float 값으로 줄수도 있지만 tuple로 (min, max)값을 설정할수도 있다
aug_f = transforms.ColorJitter(brightness=(0.2, 3))
display_augmented_images(aug_f)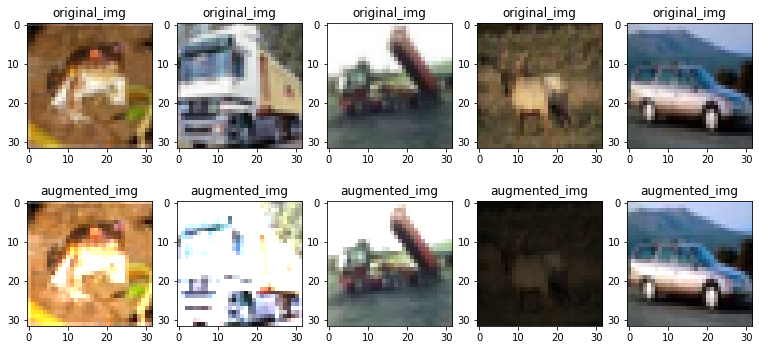
Color Jitter (contrast)
램덤하게 contrast를 설정한다
float 값으로 줄수도 있지만 tuple로 (min, max)값을 설정할수도 있다
aug_f = transforms.ColorJitter(contrast=(0.2, 3))
display_augmented_images(aug_f)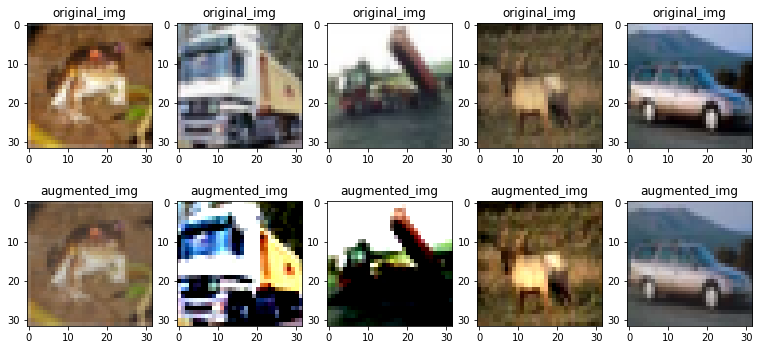
Color Jitter (saturation)
램덤하게 saturation을 설정한다
float 값으로 줄수도 있지만 tuple로 (min, max)값을 설정할수도 있다
aug_f = transforms.ColorJitter(saturation=(0.2, 3))
display_augmented_images(aug_f)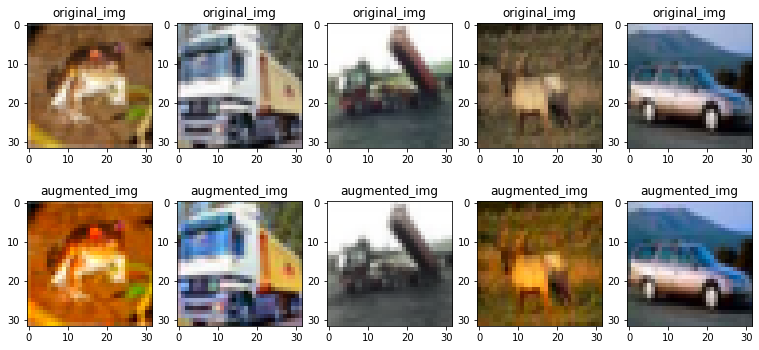
Color Jitter (hue)
램덤하게 hue을 설정한다
float 값으로 줄수도 있지만 tuple로 (min, max)값을 설정할수도 있다
hue의 경우는 -0.5 ~ 0.5 사이의 값을 해야 한다
aug_f = transforms.ColorJitter(hue=(-0.5, 0.5))
display_augmented_images(aug_f)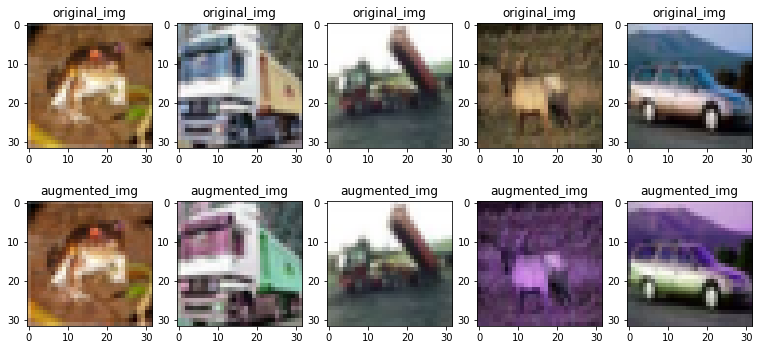
Color Jitter (ALL)
aug_f = transforms.ColorJitter(brightness=(0.2, 2),
                               contrast=(0.3, 2),
                               saturation=(0.2, 2),
                               hue=(-0.3, 0.3))
display_augmented_images(aug_f)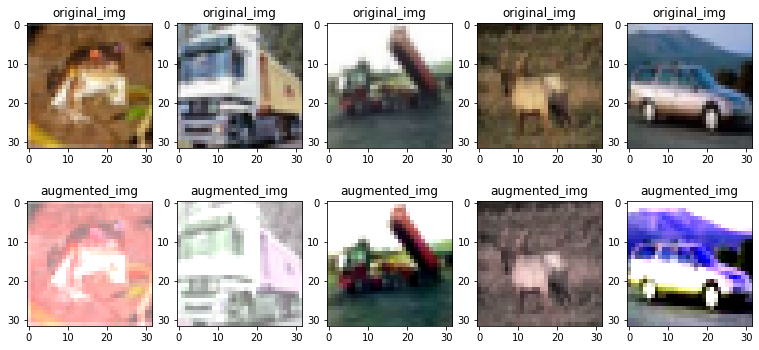
Resize
augmented image 그림의 좌표를 보면 크게 늘어난것을 알 수 있습니다.
aug_f = transforms.Resize((100, 100))
display_augmented_images(aug_f)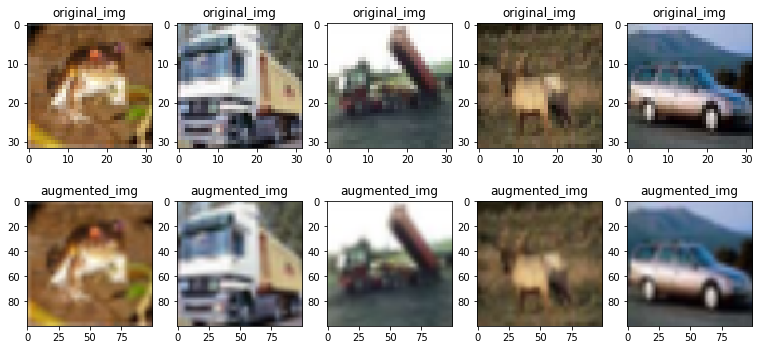
Channel Transpose
channel의 위치를 변화시키는 방법은 2가지가 있습니다.
- permute: 한번에 여러 dimension의 순서를 변경시킬 수 있습니다.
- transpose: 한번에 2개의 dimension의 순서를 변경시킵니다.
- ToTensor() 함수 사용해도 됩니다.
data = cifar10.data
data = torch.Tensor(data)
print('data shape:', data.shape)
print('permute   :', data.permute(0, 3, 1, 2).shape)
print('transpose :', data.transpose(1, 3).shape)

data shape: torch.Size([50000, 32, 32, 3])
permute   : torch.Size([50000, 3, 32, 32])
transpose : torch.Size([50000, 3, 32, 32])
ToTensor
ToTensor를 하면 channel의 위치가 바뀝니다.
물론 Pytorch Tensor로 변형도 됩니다.
- (h, w, c) -> (c, h, w)
img = cifar10.data[0]
aug_f = transforms.ToTensor()

print('image shape          :', img.shape)
print('augmented image shape:', aug_f(img).shape)

image shape          : (32, 32, 3)
augmented image shape: torch.Size([3, 32, 32])